- Accurate measurements and consistent placement are key to professional-looking handles on drawers, doors, and all cabinet types.
- Drawers: center handles horizontally and vertically; adjust slightly above center for tall drawers if desired.
- Doors: upper cabinet handles go near the bottom corner, lower cabinet handles near the top corner for ergonomic reach.
- Cabinet styles matter: Shaker, slab, inset, and overlay cabinets each have placement nuances that affect alignment and aesthetics.
- Use tools and jigs: a level, drill guide, or hardware jig ensures straight, even holes and prevents mistakes.
- Old holes and upgrades: fill with wood filler, use backplates, or strategically reuse holes when converting knobs to handles.
- Patience and double-checking: test-fit, step back to evaluate alignment, and avoid rushing to ensure a polished, cohesive look.
Installing cabinet handles looks simple until you’re standing in your kitchen with a drill in one hand, a tape measure in the other, and the sudden realization that one crooked hole will haunt you every time you make coffee. The good news is that once you understand the differences between drawers, doors, and cabinet styles, the process becomes straightforward and repeatable.
This guide breaks down exactly how to install kitchen cabinet handles across all the common scenarios you’ll run into, whether you’re upgrading old cabinets or finishing a brand-new kitchen. We’ll cover tools, measurements, placement rules, and cabinet-specific tips so you can work confidently and avoid rookie mistakes.
Tools and Materials You’ll Need Before You Start
Before drilling anything, get your setup right. A clean workspace and the right tools make a massive difference in how accurate and stress-free this project is.
You’ll want:
- Cabinet handles and included screws
- Tape measure or ruler
- Pencil or painter’s tape for marking
- Drill with appropriate drill bit (usually 3/16″)
- Level or straight edge
- Cabinet hardware jig (optional but highly recommended)
- Masking tape or painter’s tape
- Scrap wood for backing support
Having everything within arm’s reach prevents rushed measurements and accidental misalignment.
Why Placement Matters More Than the Hardware Itself
Most cabinet handles look fine in isolation. What separates a professional-looking kitchen from a DIY-looking one is consistency.
Correct placement:
- Keeps doors and drawers visually aligned
- Makes cabinets comfortable to use
- Prevents unnecessary stress on hinges
- Improves resale appeal
Once you choose a placement rule, stick with it across the entire kitchen.
How to Install Kitchen Cabinet Handles on Drawers
Drawers are the easiest place to start because they’re symmetrical, predictable, and far more forgiving than cabinet doors. Installing drawer handles first also helps you build confidence before moving on to more complex cabinet types.
Because drawers don’t swing open, placement is mostly about balance and visual alignment rather than reach or clearance.
Where Should Handles Go on Drawers?
The most common and widely accepted rule is simple:
- Center the handle horizontally on the drawer face
- Place it vertically centered on the drawer front
This creates a clean, balanced look that works with nearly every kitchen style, from traditional to modern.
For taller drawers, especially deep pot drawers or pantry pull-outs, some homeowners prefer positioning the handle slightly above center. This can feel more ergonomic and visually pleasing in modern kitchens. If you choose this approach, apply it consistently to all drawers of the same size.
Measuring Drawer Handle Placement
Accurate measuring eliminates almost every common drawer-handle mistake. Use this process for consistent results:
- Measure the full width of the drawer front.
- Divide that measurement by two to locate the horizontal center point.
- Measure the height of the drawer and decide whether you want a true center or a slightly higher placement.
- Use the handle’s screw spacing to mark both drill holes from the center point outward.
Painter’s tape placed over the drilling area helps prevent splintering, protects the finish, and makes pencil marks easier to see and adjust.
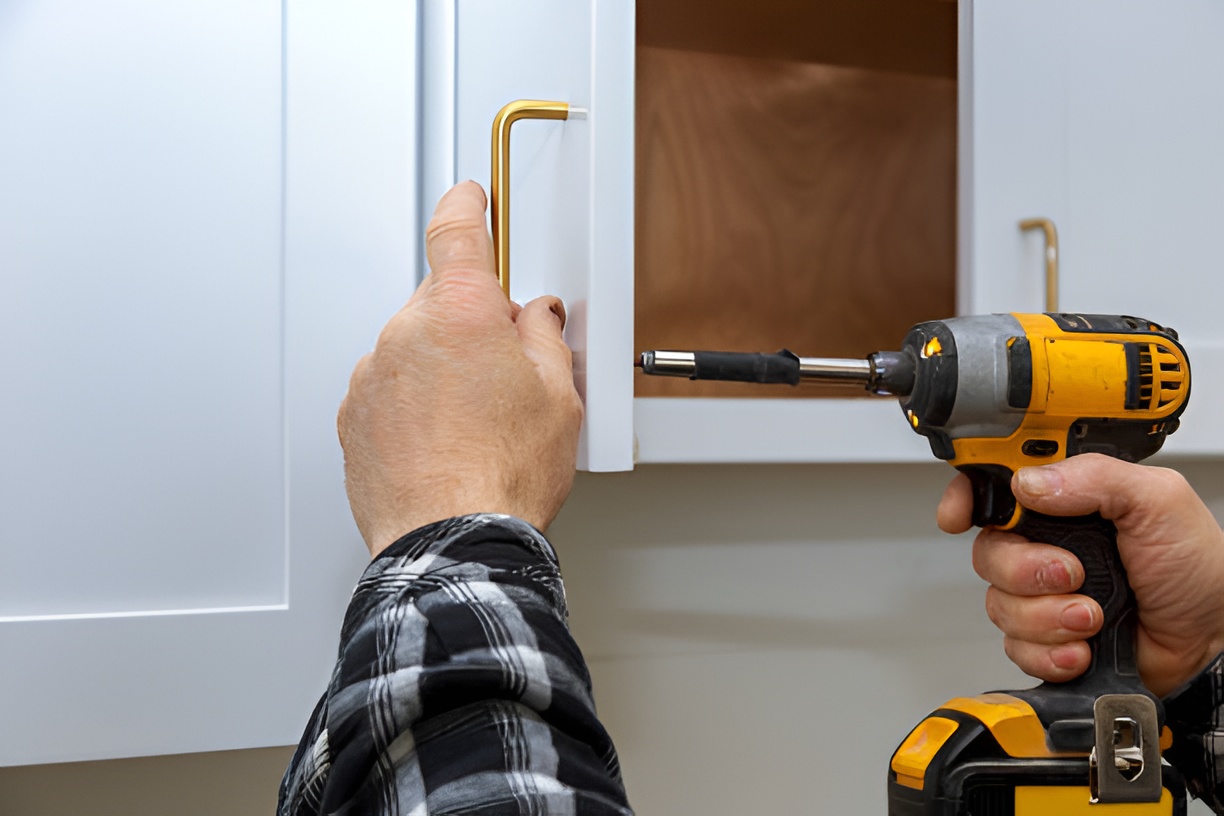
Drilling and Installing Drawer Handles
Once your marks are confirmed:
- Drill straight through the drawer front, keeping the drill perpendicular
- Apply light, steady pressure to avoid tear-out
- Insert screws from inside the drawer and thread them into the handle
- Tighten screws evenly, alternating between them to keep the handle flush
Before fully tightening, wiggle the handle slightly to ensure it’s straight and centered.
How to Install Kitchen Cabinet Handles on Doors
Cabinet doors require more decision-making than drawers because orientation, reach, and visual flow all matter. A well-placed handle should feel natural to grab and look intentional across the entire kitchen.
Upper Cabinet Doors vs Lower Cabinet Doors
The general rule is based on how people naturally reach:
- Upper cabinets: handles go near the bottom corner
- Lower cabinets: handles go near the top corner
This placement reduces strain and keeps handles within comfortable reach during daily use.
Standard Placement Measurements
A widely used and visually reliable standard is:
- Measure 2½” to 3″ from the bottom edge of upper cabinet doors
- Measure 2½” to 3″ from the top edge of lower cabinet doors
- Measure the same distance from the side edge for both
This creates a subtle diagonal alignment that looks intentional and professional when viewed across multiple cabinets.
Marking Door Handles Accurately
Accuracy matters more on doors than anywhere else. A cabinet hardware jig makes this step much easier, but you can still get great results without one:
- Use a level or straight edge to keep markings aligned
- Double-check measurements before drilling
- Mark all cabinet doors before drilling any holes
Batching the measuring phase allows you to catch inconsistencies early and make adjustments before any permanent holes are drilled.
How to Install Kitchen Cabinet Handles on Shaker Cabinets
Shaker cabinets are one of the most popular styles, but their recessed panels introduce additional placement considerations. Where you drill can dramatically affect the finished look.
Where Handles Should Sit on Shaker Cabinets
Handles should align with the cabinet frame rather than floating in the recessed panel. The frame provides structural strength and visual consistency.
Best practice includes:
- Positioning handles on the vertical frame stile
- Using identical measurements across doors and drawers
- Aligning handles with frame edges rather than panel centers
Avoid drilling into the recessed panel unless the cabinet design specifically calls for it, as this can look off-balance and weaken the panel over time.
Common Mistakes with Shaker Cabinets
The most frequent errors include:
- Installing handles too far into the recessed panel
- Using inconsistent spacing from the frame edges
- Applying different placement rules across cabinet sections
Shaker cabinets highlight inconsistencies more than flat-panel designs, so precision is especially important.
How to Install Kitchen Cabinet Handles on Slab Cabinets
Slab cabinets have flat, uninterrupted surfaces, which gives you more freedom but also removes visual cues that help guide placement.
Placement Rules for Slab Cabinet Doors
Two common placement approaches work well:
- Centered vertically and horizontally for a clean, minimalist look
- Edge-aligned for a more modern or industrial style
Both options are valid, but mixing them usually creates visual confusion. Choose one approach and apply it consistently across the kitchen.
Keeping Slab Cabinets Looking Clean
Because slab cabinets show every detail:
- Use a jig or template to maintain uniformity
- Measure twice before drilling
- Avoid eyeballing placements, even if they look “close enough”
Even small misalignments stand out against flat surfaces with no visual breaks.
How to Install Kitchen Cabinet Handles on Inset Cabinets
Inset cabinets sit flush within the cabinet frame, creating a refined, furniture-like appearance. That same precision also makes installation less forgiving.
Special Considerations for Inset Cabinets
When working with inset cabinetry:
- Door clearance is tighter than with overlay styles
- Handles must not interfere with adjacent doors or drawers
- Screws may need to be shorter than standard hardware screws
Always test-fit a handle and open the door fully before drilling all cabinets.
Best Placement Tips
To avoid issues:
- Follow frame-alignment rules similar to Shaker cabinets
- Keep handles far enough from edges to prevent rubbing
- Open and close doors before final tightening
Inset cabinets reward patience and careful planning with a high-end finished look.
How to Install Kitchen Cabinet Handles on Overlay Cabinets
Overlay cabinets are the most common and forgiving style, making them ideal for DIY installations.
Full Overlay vs Partial Overlay
Understanding the difference helps with visual alignment:
- Full overlay: doors cover most or all of the cabinet frame
- Partial overlay: a portion of the frame remains visible
While handle placement rules remain similar, full overlay cabinets require extra attention to alignment because the frame isn’t visible to hide inconsistencies.
Maintaining Visual Consistency
To keep everything looking intentional:
- Use identical measurements for every cabinet
- Align handles horizontally across rows of cabinets
- Step back frequently to evaluate the overall look
Small adjustments early in the process prevent noticeable alignment issues once all hardware is installed.
Should You Use a Cabinet Hardware Jig?
If you’re installing more than a few handles, the answer is yes.
Benefits include:
- Faster installation
- Consistent hole placement
- Reduced measuring errors
- Less mental fatigue
A jig turns a stressful project into a repeatable process.
Drill Bit Size and Screw Length Explained
Most cabinet handles use:
- 3/16″ drill bits
- 8-32 screws in varying lengths
Always test on scrap wood or the back of a cabinet before committing.
If screws are too long:
- Use washers
- Trim screws with a hacksaw
- Buy shorter replacements
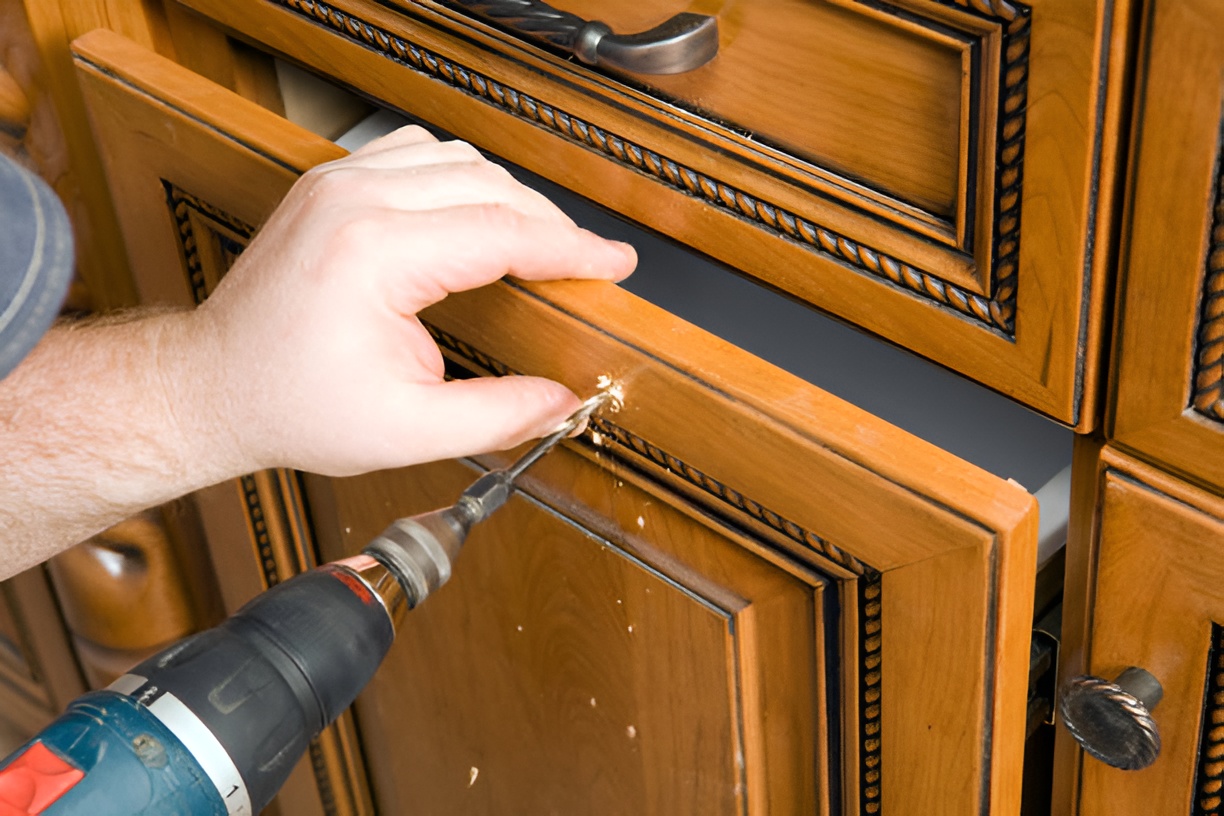
How to Avoid Crooked or Chipped Holes
Mistakes happen most often during drilling.
Prevent them by:
- Using painter’s tape over the drill area
- Drilling slowly and steadily
- Backing the cabinet with scrap wood
- Keeping the drill perfectly perpendicular
Rushing this step is the fastest way to ruin a cabinet face.
Installing Handles on Existing Cabinets with Old Holes
Upgrading from knobs to handles is one of the fastest ways to modernize a kitchen, but it often leaves you dealing with old holes that don’t line up with new hardware. How you handle those holes can make the difference between a clean upgrade and a visibly patched cabinet.
The right solution depends on the cabinet material, finish, and how much you want the old hardware to show, if at all.
Common Solutions for Dealing with Old Holes
There are several effective ways to address existing holes, each with its own advantages.
- Wood filler and touch-up paint: This is the most seamless option for painted or stained wood cabinets. Fill the old hole completely, smooth it flush, and allow it to cure fully before sanding and repainting or staining. Once finished properly, the repair is nearly invisible.
- Decorative backplates: Backplates sit behind the handle and cover old holes without the need for filling or repainting. They’re especially useful for vintage or decorative kitchens and for homeowners who want a reversible solution.
- Reusing one existing hole if spacing allows: In some cases, one of the old knob holes can align with one end of the new handle. This reduces drilling and patching, but only works if the alignment looks intentional and symmetrical.
Best Practices When Filling Old Holes
If you choose to fill and redrill:
- Use a filler appropriate for your cabinet material
- Slightly overfill to allow for sanding
- Sand smooth once fully cured
- Prime if necessary before repainting
Never rush this step. Drilling into filler that hasn’t fully cured can cause cracking or weak screw hold.
Drilling New Holes After Patching
Once repairs are complete:
- Re-measure handle placement from scratch
- Use painter’s tape to protect the surface
- Drill slowly to avoid damaging the repaired area
Taking the time to reset your measurements ensures the new handles look intentional rather than adapted.
Common Installation Mistakes to Watch For
Even careful DIYers make these errors:
- Mixing placement styles
- Forgetting to measure from the same reference point
- Overtightening screws
- Drilling before confirming alignment
Slowing down is the easiest fix.
Final Alignment Check Before You Finish
Before calling it done:
- Open and close every door and drawer
- Check alignment across cabinet rows
- Tighten loose screws
- Clean off pencil marks and tape
This final walkthrough ensures everything feels as good as it looks.
When to Consider Hiring a Professional
DIY installation is absolutely doable, but a professional may make sense if:
- Cabinets are custom or very expensive
- You’re working with stone or metal fronts
- The kitchen layout is complex
- Perfection is critical
Sometimes paying for peace of mind is worth it.
Closing Thoughts
Learning how to install kitchen cabinet handles on drawers, doors, and different cabinet types is less about drilling holes and more about planning, measuring, and consistency. When you approach the project methodically, the result looks polished and intentional rather than improvised.
Take your time, trust your measurements, and don’t be afraid to practice on scrap material. The confidence you gain on the first few handles makes the rest of the kitchen fly by, and the finished result is something you’ll appreciate every single day.